INTRODUCTION
Let’s consider a real-world scenario where most of the companies are facing challenges with legacy applications. Consider you are maintaining or administrating legacy applications which are hosted on your company’s infrastructure. However, the hardware is aging and requires upgrading in order to support new applications which are being deployed on it.
As the market evolves, you are in urgent need of upgrading your hardware in order to support your business needs. At the same time, your data is growing at a fast pace and requires latest platform and services to keep your business running.
You could upgrade all the hardware, but that’s not appealing for several reasons:
- The servers are physically scattered all around the world in different locations. You would like to centralize the upgrade in order to minimize the staff efforts.
- Adding new physical servers or services in order to support your business would be a time consuming and cumbersome activity as it involves deployment of all the services. This could be more challenging if your software has different versions of Windows and Linux and requires your deployments to be tested out to ensure everything is working fine.
For above reasons, you decide to explore cloud operations to meet your business as well as technical needs to see if it can help solve the load and scale problem. Since you have a bunch of mixed servers and custom software, it makes sense to look at Azure using Azure Virtual Machines (VMs).
Azure VMs are one of several types of on-demand, scalable computing resources that Azure offers. With VMs, you have total control over the configuration and can install anything you need to perform the work. You don’t need to purchase physical hardware when you need to scale or extend your datacenter. Finally, Azure provides additional services to monitor, secure, and manage updates and patches to the OS.
With the VMs, you are not required to have your staff situated at different data centers to perform upgrades. Along with it, if you wish to upgrade infrastructure, it will be done with simple clicks on azure portal to upscale your system (automatic as well as manual).
We’re going to look at the decisions made before creating a VM, the options to create and manage the VM, along with what is VMs and why we should opt it.
Learning objectives
In this article, you will:
- Describe virtual machine and its advantages, usage.
- VM sizes and creating Azure virtual machine in Azure Portal
- Pricing tier
WHAT IS AZURE VIRTUAL MACHINE?
- Users can create their own virtual machine.
- Each Azure Virtual Computer platform comes loaded with various software including Databases. Therefore, users can conveniently work in the environment without having to worry about software and other logistics.
- Based on the requirements of the client, the capacity of the Virtual machine can be increased.
- Clients who are concerned about data privacy can also choose in which region they want data servers to reside.
ADVANTAGE OF AZURE VIRTUAL MACHINE
Generally, all the legacy system infrastructure has its servers scattered around the world. Sometimes to access any specific server user needs to connect via VPN. Sometimes the situation is so bad that one needs to be on the premise only to access any system. In the Azure platform, the same services can be accessed from any part of the world with an internet connection. Here are few advantages briefly:
- Scalability: As the demand increases, the system capacity can be increased accordingly. Therefore, scalability is a major advantage here. You can upscale or down scale VM sizes at any point of time – automatically or manually.
- Storage: Users can share various storage options like private storage, public storage or both based on the sensitivity of data.
- Customization of Controls: Enterprises can customize the control options based on the sensitivity and volume of the data.
- Tools: Users and developers can use prebuilt out of the box tools, that will not only optimize the process but also save a lot of their time.
- Security: This system comes with various encryption options along with customizable measures to increase the security of the data and up to date vulnerability fixes for infrastructure, including physical, operational, and software measures.
- Accessibility: Accessible from any internet-connected device.
- Speedy Market Introduction: Using Azure results in the fast market introduction of services and platforms due to out of the box provisions.
- Regular Updates: Regular system upgrades is a major advantage of Azure with respect to the legacy system.
WORKLOADS OF AZURE VIRTUAL MACHINE
In cloud computing, the workload denotes the amount of processing that the computer has given to do a certain task within the given time. The workload consists of a certain amount of application programs processing in the computer and some users are connected to and interacting with the computer’s applications. Usually, the workload of the Azure Virtual Machine is categorized into two categories.
| Suitable Workloads | Unsuitable Workloads | |
| • The workloads that are suitable for hosting in an Azure IaaS infrastructure are • Service workloads like commercial online stores • Unpredictable growth workloads such short-term increased sale and developing the organization • Retail sales during festival holidays | • Limited growth business that can able to run the service at less cost than cloud • Regulated environment workloads that cannot able to move to the cloud as per the rules |
Azure Virtual machine will let us create and use virtual machines in the cloud as Infrastructure as a Service. We can use an image provided by Azure, or partner, or we can use our own to create the virtual machine.
Virtual machines can be created and managed using:
- Azure Portal (We will be talking more on how to create using azure portal)
- Azure PowerShell and ARM templates
- Azure CLI
- Client SDK’s
- REST APIs
Following are the configuration choices that Azure offers while creating a Virtual Machine.
- Operating system. (Windows and Linux)
- VM size, which determines factors such as processing power, how many disks we attach etc.
- The region where VM will be hosted.
- VM extension, which gives additional capabilities such as running anti-virus etc.
- Compute, Networking, and Storage elements will be created during the provisioning of the virtual machine.
I will be taking you through on creating Azure VM using Azure portal in this article.
VM SIZES AND PRICING
It is important to select the right VM size and type for the working of our virtual machine perfectly. So, these are the VM sizes that are available within Azure. Refer https://azure.microsoft.com/en-in/pricing/details/virtual-machines/windows/ to understand virtual machines pricing.
| Type | Sizes | Description |
| General-purpose | B, Dsv3, Dv3, DSv2, Dv2, DS, D, Av2, A0-7 | It has balanced CPU-to -memory ratio, it is ideal for testing and development, small to medium databases, and low to medium traffic web servers. |
| Compute-optimized | Fsv2, Fs, F | It has a high CPU-to-memory ratio. It is suitable for medium traffic web servers, network appliances, batch processes. |
| Memory-optimized | Esv3, Ev3, M, GS, G, DSv2, DS, Dv2, D | Is has a high memory-to-CPU ratio. Great for relational database servers, medium to large caches, and in-memory analytics. |
| Storage optimized | Ls | It has high disk throughput and IO that is Ideal for Big Data, SQL, and NoSQL databases. |
| GPU | NV, NC, NCv2, ND | It is a specialized virtual machine that is targeted for heavy graphic rendering and video editing. Available with single or multiple GPUs. |
| High performance compute | H, A8-11 | It is the fastest and most powerful CPU virtual machine with optional high-throughput network interfaces (RDMA). |
CREATING AZURE VIRTUAL MACHINE IN AZURE PORTAL
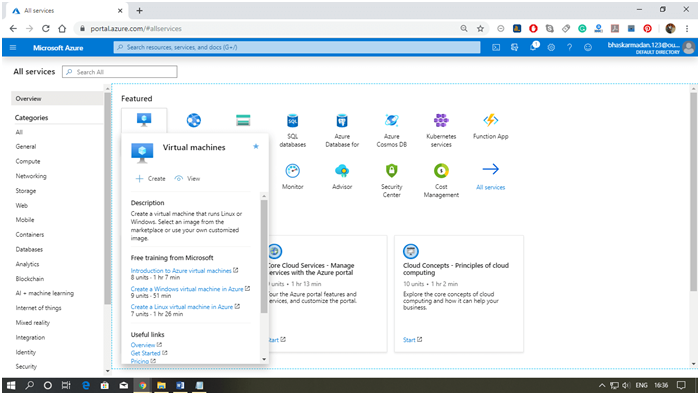
Step 1: Go to https://portal.azure.com, login and click on All services and then click on the Virtual machine button, as shown in the following image.
Step 2: Click on create, then you will be redirected to the Create Virtual machine page.
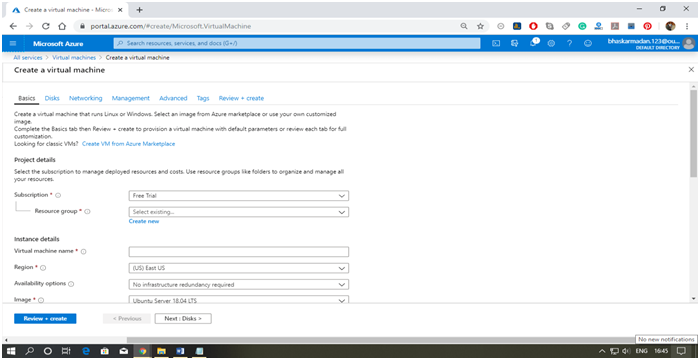
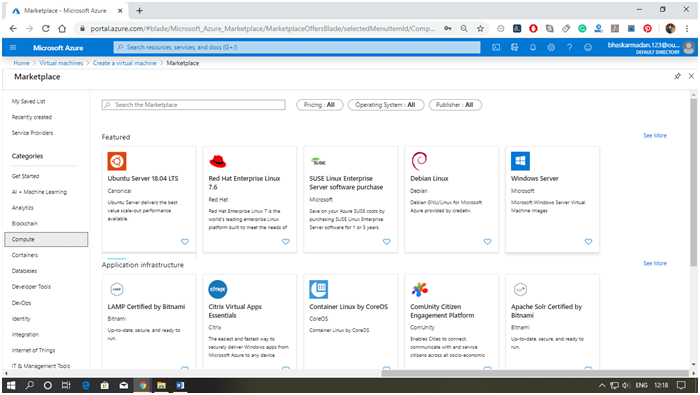
Step 3: Now, select the image for your virtual machine from the Azure marketplace by clicking on “Create VM from Azure marketplace”.
Step 4: After selecting the image, the first thing you need to do is to provide a name to your virtual machine.
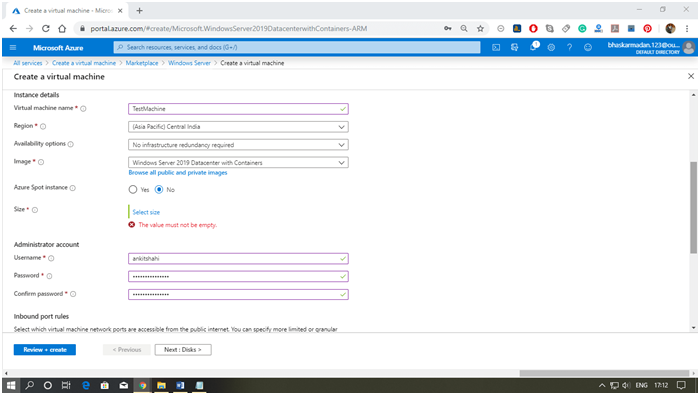
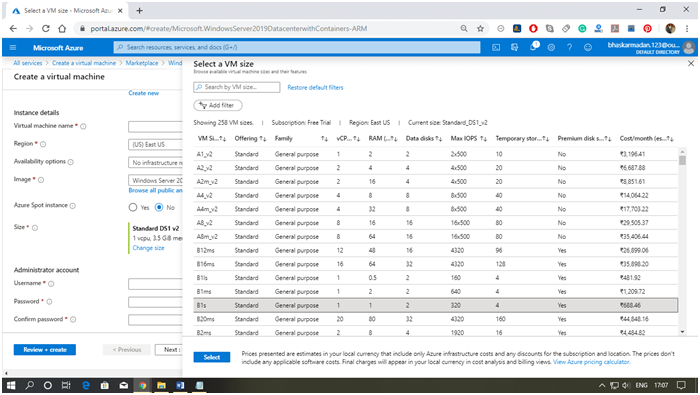
Step 5: Now select the size and type of VM according to your requirements. After that, set a Username and password for your Virtual Machine then click next.
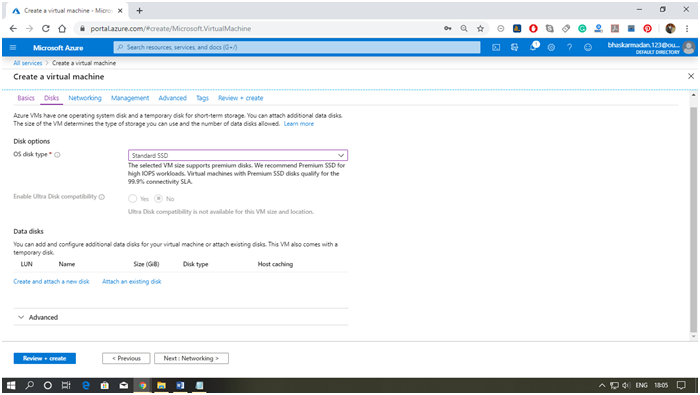
Step 6: You are on the disk tab now; Select the disk type you need then click next to redirect on the networking page.
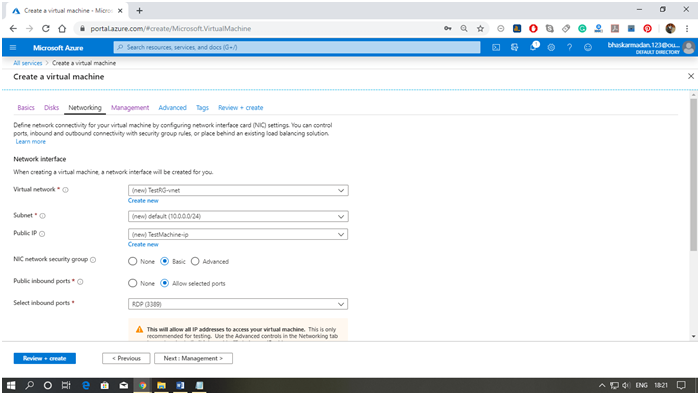
Step 7: Select the virtual network, subnet, and IP address for the Virtual machine. We are leaving it as default because we are creating it for the training purpose.
Step 8: Now select the management tab and choose the boot and OS diagnostic option. Then click next.

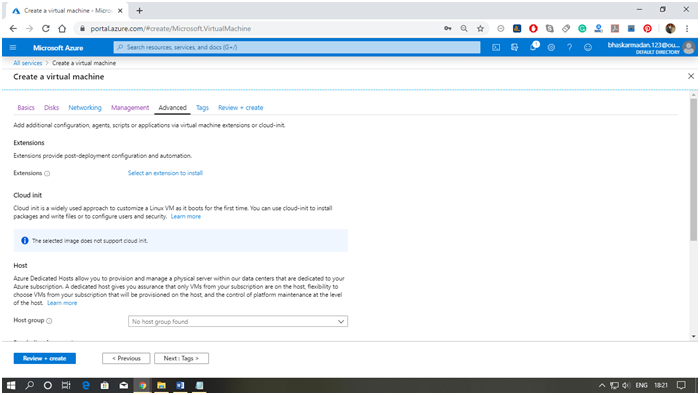
Step 9: In advanced settings, you can embed an extension to the virtual machine.
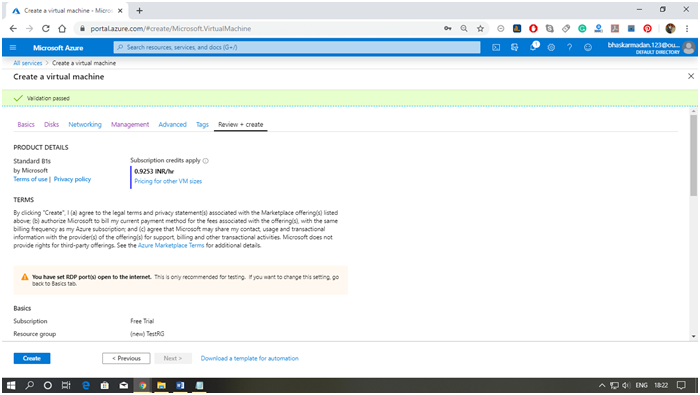
Step 10: Now, on the review and create a window, click on the create button.
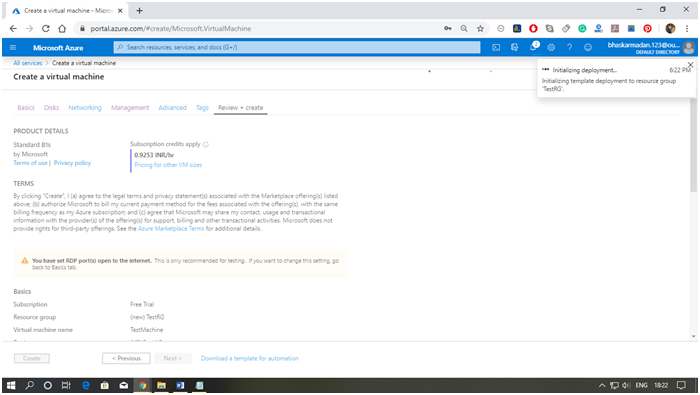
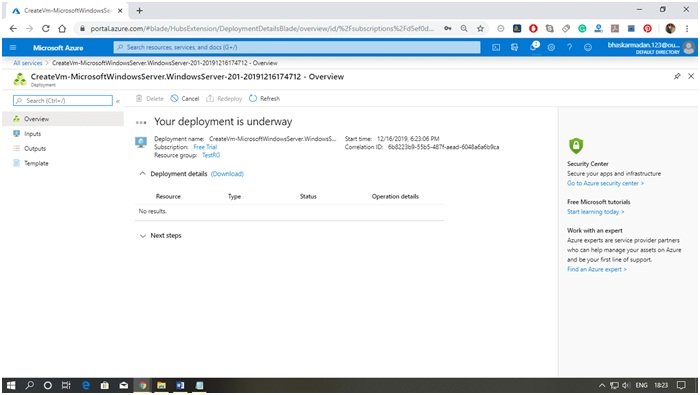
Step 11: When you click on Create, the further process will start. Wait for a few minutes to complete the
processing.
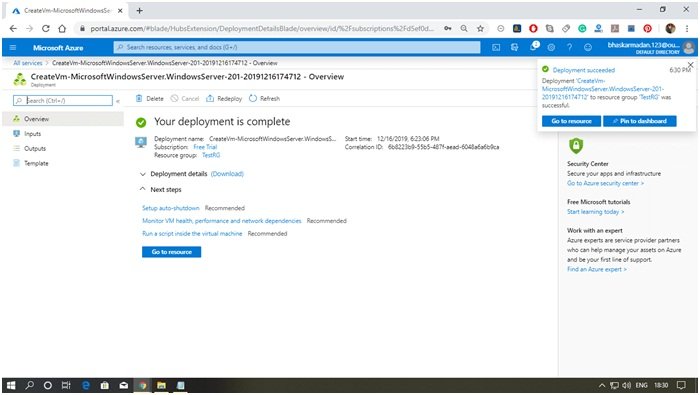
When your Virtual Machine is created, the following window will appear. You can now use your virtual machine.
FINAL THOUGHTS
This is the vital information that you need to know about Azure Virtual Machine. Hope that you all have understood that Azure Virtual machines are the right option to deploy the cloud-based solutions. So, create the Azure virtual machines to face the challenges that may occur in the large infrastructure. Make use of this Azure Virtual Machine Tutorial to Get Well-Versed in Microsoft Azure and Reap Its Complete Benefits.